Whether you’re exploring ecommerce for the first time or examining whether your existing platform still suits your business, make sure to include Shopify on your list of options.
-
Shopify in “The New
Normal” - The Case for Shopify
-
Is Shopify Right for
Your Business? -
Migrating to Shopify:
11 Easy Steps -
Step 1: Configure Your Basic
Administrative Settings -
Step 2: Import Your Store's
-
Step 3: Organize Your
Products After Migration -
Step 4: Decide on Your
Website’s Appearance - Step 5: Set Up Your Domain
- Step 6: Set Up Your Shipping
- Step 7: Configure Your Taxes
-
Step 8: Set Up a Payment
Provider -
Step 9: Place Some Test
Orders -
Step 10: Invite Customers to
Create Accounts on Your
New Site -
Step 11: Set up URL
Redirects -
Platform-Specific Migration
Guides - Migrating for a Client
-
Shopify: A Great Customer
Experience
Shopify in “The New Normal”

Among the few silver linings to the economic disruption of 2020 was the massive increase in online shopping.
Many ecommerce sectors boomed as even the most committed brick and mortar shoppers turned to online stores to fulfill their everyday needs. In fact, according to McKinsey, at the height of the COVID-19 pandemic, 10 years of ecommerce growth happened in just 90 days.

Here’s how this shook out in actual dollars: Consumers spent $861.12 billion online with U.S. businesses in 2020, up an incredible 44% year over year, according to Digital Commerce 360 estimates.
While that type of exponential growth has slowed through 2024, digital retail is here to stay. In Q4 2024, ecommerce sales accounted for 24.6% of total retail sales, which is up from 23% in 2022.
What does that mean for ecommerce businesses?
Shopify consumer surveys have identified three consumer trends as a result of this shift online:
-
More competitive online landscape
-
Demand for more personalization
-
Rise in social commerce
Companies need to clearly articulate their brands, go beyond personalization to create community, and develop omnichannel strategies that include social media.
Many companies are already responding to these trends by launching (or accelerating their expansion) into ecommerce. The multiple options available for opening an online store have made this transition easy, with ecommerce platforms like Shopify hosting a large share of the new storefronts.
Shopify’s own numbers tell the tale:
-
2.5 million active stores
-
$300 billion GMV in 2024
-
$11.5 billion in sales during 2024 Black Friday & Cyber Monday
Ecommerce brands with Shopify stores have begun to lean heavily on social media sites as well:
-
Instagram is used by 48.7% of Shopify stores.
-
Facebook is used by 31.7% of Shopify stores.
-
YouTube is used by 11.8% of Shopify stores.
The Case for Shopify

Shopify by the numbers:

Shopify powers nearly 1 million online stores in the United States.
![]()
Sales on Shopify have surpassed $292 billion.
![]()
There are 10,978 peak checkouts per minute across Shopify.
![]()
To date nearly 4 million Shopify businesses worldwide have made over $543 billion in sales.
![]()
Shopify is available in 175 countries and 20 languages.
Shopify makes it easy for any category of online business to get started and grow. It can be used to sell virtually anything, including thesee trending products in 2025:
Learn more about the opportunities for ecommerce in the fashion and luxury goods, automotive parts, cosmetics, fitness and sporting equipment, and home goods categories.
What is it about Shopify that has drawn nearly one million American businesses from industries as diverse as sports, health, food and beverage, and automotive?
In a word, it’s versatility.
Here are some reasons why Shopify is so popular with businesses:
-
Ease of use and functionality. Shopify delivers all the features that a business owner might need without having to be a coding whiz.
-
Shopify offers all the tools needed for launching a site within minutes. And the Shopify App Store offers countless third-party services and apps to extend functionality as needed.
-
Point-of-sale (POS) technology, including hardware, serves direct-to-consumer brands that are seeking to open physical retail stores.
-
Shopify comes with high-quality tools like abandoned cart recovery, online invoice generator, and more.
-
Shopify is scalable, has built-in potential for dropshipping fulfillment, and offers financing.
For a deep dive into all the benefits Shopify offers merchants as an ecommerce platform, see our full review.
Is Shopify Right for Your Business?
If you’re not certain whether Shopify is right for your ecommerce business, here are a few reasons why you may want to consider it:
-
With Shopify, you don’t have to be a search engine guru: Features like built-in Search Engine Optimization (SEO) make your site easily found on all major search engines.
-
You don’t need to be a website designer; the plethora of built-in templates and themes let you choose or customize a site design that is exactly what you want.
-
If you plan to sell internationally, Shopify allows you to make your store multilingual in up to 50 languages and is ahead of the game in handling personal information in compliance with the EU’s GDPR regulations. On the hot topic of security, all stores powered by Shopify are PCI compliant by default, so payment info and business data stay safe.
-
For businesses considering Shopify as a platform, a 14-day free trial lets you kick the tires before making a commitment. The lower-tier plans are very affordable, making them a good choice for small businesses that are just starting out and want to minimize costs.
Learn more about the ecommerce market in some of Shopify’s leading countries.
- 1. United States
- 2. Australia
- 3. Canada
- 4. United Kingdom
|
Basic For solo entrepreneurs |
Shopify For small teams |
Advanced As your business scales |
|
|
Monthly price |
$19 USD/month |
$52 USD/month |
$399 USD/month |
Shopify users can also access the most comprehensive fraud protection in the industry.
Shopify Integrates Perfectly With ClearSale
Most other fraud detection methods don't match the sophisticated threats posed by today's fraudsters. ClearSale's technology instantly processes transactions using a proprietary statistical model, assigning each a comprehensive fraud score:
- Legitimate orders are approved instantly
- Potentially fraudulent orders are quickly reviewed by ClearSale's expert team
- Companies maintain sales momentum while staying protected
- Instant Decision ClearSale is a 100% outsourced solution that delivers real-time decisions fast.
- Automatic Decision ClearSale is a 100% outsourced solution that identifies fraud in under one minute with notifications in less than one hour.
- Complete Decision ClearSale is a 100% outsourced solution that auto-approves valid orders, blocks fraud, and flags suspicious orders for analysis. This solution is also eligible for ClearSale’s Chargeback Guarantee.
At ClearSale, we are proud to maintain the highest approval rates and lowest false decline rates in the industry, allowing business to grow confidently while staying protected.
Step 1: Configure Your Basic Administrative Settings

Before you start adding products and setting up your payments, there are a few administrative tasks you should do:
-
Review the ecommerce store migration considerations to make sure your migration goes as smoothly as possible.
-
Complete the initial setup so your store address, email address, and other store settings are up to date.
-
Know where to manage your account and access your billing information.
-
Add staff accounts so each of your staff members has a personal login account and all sensitive account information remains secure.
Step 2: Import Your Store's Content and Data to Shopify
It can take a while to migrate your data, so start working on a plan as soon as possible.
Evaluate your existing data and decide what needs to migrate. List the types of data that you track in your old platform. In the list, include how much data you have for each amount.
Examples of the types of data that you might want to migrate include: products; customers; historical orders (orders that have been fulfilled); gift cards, certificates, and store credits; discount codes; blogs; pages (shipping policy, contact, and other webpages); and product reviews.
Learn about how to prevent gift card fraud
After you've decided on the data that you want to migrate, you need to decide how you will migrate this data and in what order. Here are a few options you can use to migrate your data:
-
Copy and paste content from your old site
-
Use existing migration apps from the Shopify App store
-
Create (or hire a partner to create) an app that uses the Admin API
-
Transfer data manually using CSV files (this option can migrate customers and products only, and does not include customer passwords)
The options you choose depend upon the developer resources you have and the amount of data you need to move. If you need to migrate a lot of content, then you likely need to use an app. But don't overlook copying and pasting as an option, especially when you need to migrate small amounts of content, such as shipping pages and policies.
The following table lists the different types of data and the migration options that are available:
| Data | Migration Options |
| Products | CSV file, Product API, Shopify App store |
| Customers | CSV file, Customer API, Shopify App store |
| Historical orders | Order API, Transaction API, Shopify App store |
| Gift cards, certificates, and store credits | GiftCard API, Shopify App store |
| Blogs | Blog API, Blog Article API, Shopify App store |
| Pages (shipping policy, contact, and other webpages) | Page API, Shopify App store |
| Product reviews | Shopify Product reviews app, Shopify App store |
The order in which you import your product, customer and historical order data is important. If you wish to import these types of data, then you need to import them in the following order:
-
Products
-
Customers
-
Historical orders
If you follow this order, you will have access in Shopify to your customers' complete transaction history. The migrated orders will also be linked to their associated products and customers
Find a store migration app
Migration apps reduce the amount of work you have to do to import your product information and store contents from your current online store to Shopify. You can find several free and paid migration and importing apps in the Shopify App Store.
If you want to migrate an online store to Shopify, then you can use one of the third-party migration apps available in the Shopify App Store.
Import your store's data manually using CSV files
If you choose to import your products and customers manually to Shopify, you can use CSV files to import data to your Shopify store.
Learn about the CSV file templates you need to use to import your data:

SHOPIFY PLUS:
Merchants can use the Transporter app and commandline tool to import their content into Shopify.
Step 3: Organize Your Products After Migration

If you used a migration app to import your products to Shopify, it's important to check that all of your product information was imported correctly.

Note: If you are selling digital products or services, make sure you are familiar with the differences between digital and physical goods.
How to verify your products after migration:
-
Check your product details, which include product descriptions, images, variants, and meta descriptions.
-
Create a collection to organize your products into categories and make them easier for your customers to find. You can add drop-down menus and create links to collections on your storefront.
-
Get familiar with product inventory and transfers to keep track of the products that you have available in your store. You can find inventory apps in the Shopify App Store to help you with this task.

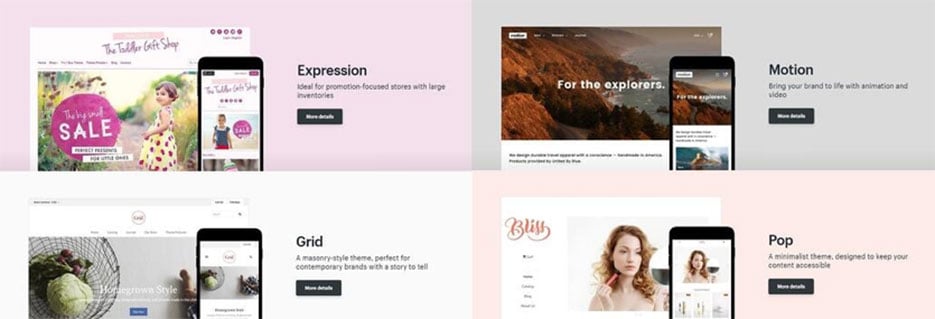
Step 4: Decide on Your Website’s Appearance
To help you get started, the Themes page of your admin has a default theme set up when you open an account with Shopify. If you want to customize a different theme for your online store, then you will need to add one to your admin.
You have a few choices for adding themes to your admin:
You can add a free theme quickly and easily from within the admin.
Free themes are developed by Shopify. Help with customizations for free themes is supported by Shopify. To add a free theme from the admin:
- From your Shopify admin, go to Online Store > Themes.
- In the free themes section near the bottom of the page, click Explore free themes. A window that shows all of the free themes will appear.
- Click any theme to read about its features and to preview the available theme styles.
- Click the Add button for the theme. The theme will be added to the Themes page of your admin.
You can buy a paid theme from the Theme Store.
Paid themes are developed by third-party designers. Help with customizations for third-party themes is provided by the theme designer. To add a theme from the Shopify Theme Store:
- Visit the Shopify Theme Store and choose a theme. If you're still in your free trial period, then choose a free theme to avoid paying any charges.
- If you've chosen a free theme, then click Add theme or start with this theme. If you've chosen a paid theme, then click Buy theme to buy the theme. Paid themes are non-refundable. To be sure that it suits your needs, you can try a paid theme before you buy it.
- For paid themes, click approve charge to approve the payment. The theme will be added to the Themes page of your admin.
You can try a paid theme before buying.
You can try a paid theme to see how it looks with your products, brand colors, and style before making the commitment to buy the theme.
While you preview a theme, you can make customizations by using the theme editor. Any changes you make will be saved when you purchase the theme. You can preview up to 19 paid themes, which allows you to compare different themes before buying.
- Visit the Shopify Theme Store and choose a paid theme.
- Click Try theme. A preview of the theme will load for your online store.
- Do one of the following:
- To stop previewing the theme, click close preview
- To purchase the theme, click buy theme
- To modify the theme settings using the theme editor, click customize theme
Even if you choose not to buy it, the paid theme will be added to the Themes page of your admin. Paid themes that you are trying will have a Theme trial label.
Step 6: Set Up Your Shipping

It's very important to set up shipping rates and shipping methods correctly before you launch — you don’t want to have to refund customers for overcharging them. Nor do you want to email customers asking them to pay more because you didn’t charge enough to cover the shipping of their order.
For more information about order shipping and fulfillment, click here.

If you are selling digital products or services, you need to disable the shipping option because your customers won't be receiving any physical goods.
To set up your shipping:
-
Add your shipping address to get accurate shipping rates based on your location.
-
Create shipping zones to enable shipping to different regions, states, and countries.
-
Configure your shipment dimensions if you're using carrier-calculated shipping rates. Many carriers use volumetric weight (the height, weight, and depth of a package) to calculate shipping rates.
-
Set up shipping rates for the shipping zones that you've created.
-
Pick a shipping strategy that works for your business. You might find it helpful to look through some options to see what meets your needs before making a decision.
-
Look through fulfillment services and decide if you're going to ship orders yourself or if you'll let someone else handle order fulfillment for you.
Step 7: Configure Your Taxes
Charging sales tax is an important part of running your business. Depending on your location, there are different rules and regulations about sales tax that apply to your products. To make sure your store meets those rules, take some time to understand Shopify’s tax setup process.

If your store ships to Europe, there are regulations that apply when selling digital products.
Charge taxes based on your shipping destinations
When you set up your shipping, you can apply shipping taxes to your products based on the customer's state, provincial, or regional tax regulations. These are calculated automatically by Shopify.
If you need to adjust taxes manually, based on a region with unique tax restrictions or based on a specific collection of products, then you can do so with a tax override.
Keep track of your taxes
When you configure the tax settings for your products, you should also think about how you are going to keep track of your taxes throughout the year.
If you’re not sure about what system you are going to use to keep track of your taxes, you might want to look at some accounting apps in the Shopify App Store.”
Step 11: Set up URL Redirects

Redirect traffic from your old platform to your new store.
-
Log in to the platform from which you’re migrating.
-
Find the URL redirects section in your account settings. The placement of this varies by platform. If you're unable to find where to add URL redirects, search the Help Center of the platform you're migrating from.
-
Enter your old URL in the from field and a new Shopify URL in the to field.
-
Repeat this process for all the URLs you want to redirect.
Platform-Specific Migration Guides

Platform-specific guides provide step-by-step instructions for migrating your client's store from other popular ecommerce platforms to Shopify.
If you’re using the Shopify Import Store app to migrate your product, order, and customer data, you’ll need to export this information from your current platform first:
-
WooCommerce
-
To export data from WooCommerce, from the admin page, click Tools > Export > All content > Download Export File
-
Squarespace
-
To export products from Squarespace, from the home menu, click Commerce > Inventory > … > Export as CSV
To export orders from Squarespace, from the home menu, click Commerce > Orders> Export as CSV
-
Etsy
-
To export product data from Etsy, from the dashboard, click Settings > Options > Download Data > Currently for Sale Listings > Download CSV.
To export customer and order data from Etsy, from the dashboard, click Settings > Options > Download Data > Orders > [Month/Year] > Download CSV
To export order items data from Etsy, from the dashboard, click Shop Manager > Settings > Options > Download Data > Order Items > [Month/Year] > Download CSV
-
BigCommerce
-
To export products from BigCommerce, from the dashboard, click Products > Export > Export Template and File Format Options > Default > Continue > Export my Product to a CSV file
To export product details and variant data from BigCommerce, under Export Template and File Format Options, click Bulk Edit > Continue > Export my Product to a CSV file
To export order data from BigCommerce, from the dashboard, click Orders > Export > Export Template and File Format Options > Default > Continue > Export my Orders to a CSV file
To export customer data from BigCommerce, from the dashboard, click Customers > Export > Export Template and File Format Options > Default > Continue > Export my Customers to a CSV file
-
Big Cartel
-
To export order and customer data from Big Cartel, from the dashboard click Orders > Shipped/Unshipped > More Actions > Download CSV
Migrating for a Client
As a Shopify Partner, the best way to start migrating a client’s store is by creating a development store in your Partner Dashboard. Then you can choose the migration guide that applies to your client’s current store and follow it to import their data into the development store. When you’re done, you can transfer ownership of the development store to your client.
To learn more about how this process works, see creating development stores and handing off development stores to clients.

Shopify: A Great Customer Experience
No matter where you are in the development of your ecommerce store, Shopify offers powerful yet easy to use capabilities that, in accordance with the company’s mission, “help people achieve independence by making it easier to start, run, and grow a business.”
In addition to making it easier to run an ecommerce business, Shopify offers features that improve the customer experience, making new and long-term customers more likely to browse, buy, and recommend your ecommerce store to their friends and networks.
One important note for businesses considering Shopify is that the platform sunset its fraud filter app in January 2025.
That means merchants will need to have a fraud protection solution in place before accepting transactions. ClearSale offers three options for fraud protection based on desired decision speed. Find out which speed is best for your business.

ClearSale Reviews
Great fraud prevention for ecommerce sites
"ClearSale has a great fraud protection program using their algorithmic matching of potentially fake orders, and will scan them as they come up and reject them if they are suspected as fraud."
Lee K.
Great Value
"The product is great. We've never had a complaint from day 1. The setup was easy. And the continued service has been exceptional. With a product like this, you want it to work behind the scenes without ever thinking about it. That's ClearSale. It does exactly what it is supposed to do and never causes us troubles."
Nathan N.
Amazing - takes the stress away from me!
"I love that it takes the stress away from me worrying about fraud charges."
Dustin D.
ClearSale Has Been Amazing!
"Quick fraud detection on all orders. Ease of use on the platform. Never had a chargeback."
Anonymous


Ready to
Get Started?
